
🏙️ Imagine you're 'Example Investment Co'. How can you personalise your CreateiQ account?
Well, how do you work in real life? If you're like us, dividing workflows between geographical branches, cross-functional teams, transactional areas, allows you to effectively manage each (whilst also keeping any necessary walls between workstreams for information security purposes).
Workspaces
- Workspaces are your key organisational tools. Think of each like a separate folder. Each folder can hold different users, entities and negotiations.
- Workspaces work in conjunction with Entities, as entities sit within workspaces.
- This segregation is useful to create information barriers. A workspace can be used to differentiate divisions, departments or regions e.g. Example UK Branch vs Example NY Branch.
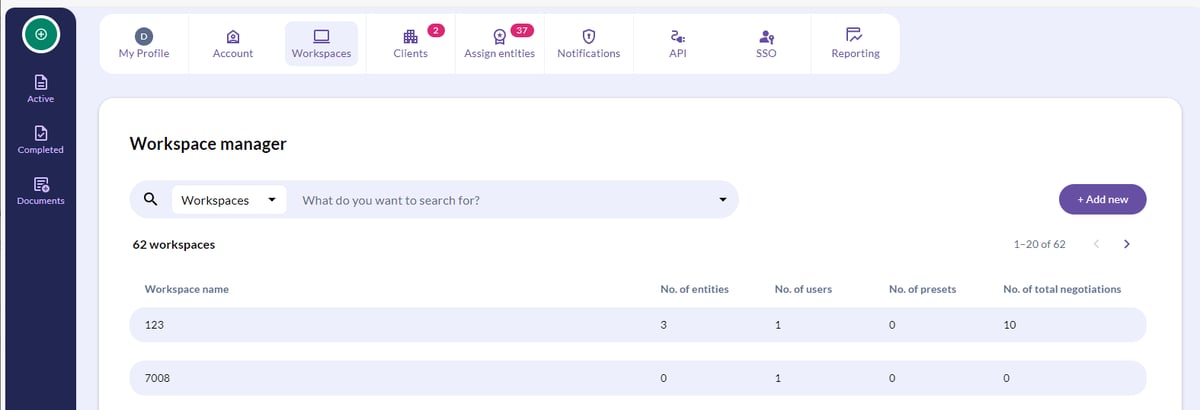
To create a new workspace, go to Settings click on Workspaces in the toolbar along the top of the screen, click Add new and then select the New workspace option from the drop down menu. Type in your chosen workspace name and click on Create workspace.
Only Super Managers and Admin users can create workspaces. More information regarding user roles can be found here.
To navigate between workspaces, simply click on the Settings tab (click on the cog in the bottom left of the screen) click on Workspaces in the menu at the top of the screen.
How do I add/remove Workspace access for a user?
A Super Manager or Admin user can add and remove workspace access for other users.
💡 Super Managers/Admin users cannot remove other Super Managers. Before following the steps below, you can change the user permissions in order to revoke workspace access.
To add a user to a workspace:
- Go to Settings > Workspaces.
- Click Add new > New user.
- Fill out the new user's details and select the relevant workspace you wish to add them to.
To remove a user from a workspace:
- Go to Settings > Workspace.
- Select the relevant workspace.
- Select the user you wish to delete.
- Click Delete user > Confirm.
Allocate entities to your workspaces
Super Managers and Admin users can create entities. More information regarding user roles can be found here.
As part of your account set up you must add your organisation's legal entity names to CreateiQ. You and your counterparties will negotiate documents using these entities.
- As with any contract, each negotiation takes place between Legal Entities, e.g. Example London Co and Example NY Co.
- On CreateiQ, each Entity sits within a workspace, which act as folders. This means that any negotiation to or from an Entity will be stored, and only accessible, from its workspace.
It's helpful to set up your workspaces before saving your entities.
How to add your legal entities
- Go to Settings > Workspaces.
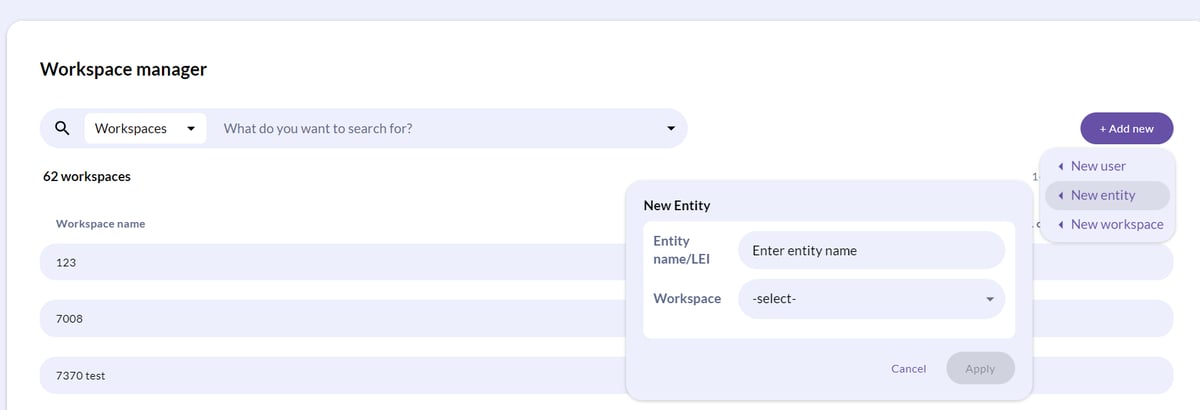
- Click Add new > New entity.
- Fill out the entity name.
- Select a workspace from the dropdown menu that you'd like the entity to be saved to.
- Click Apply.
💡 The GLEIF database is incorporated into CreateiQ, so when searching for a legal entity you can search by name or LEI.
Do you need to reassign an entity to a different workspace?
Sometimes you might need to move an entity from one workspace to another. This is particularly helpful to change the visibility within your team of the negotiations connected to that entity.
How to reassign an entity to a different workspace
- Go to Settings > Workspaces.
- Select Entities from the dropdown menu.
- Click on the Entity that you wish to reassign from the list of Entities.
- Select your desired Workspace from the dropdown menu on the left hand pop up screen and click Save.
Note: When reassigning an entity to a new workspace ALL negotiations connected to that entity will also be moved to the new workspace. Don't worry - these can be moved back again by simply reassigning the entity to the existing workspace if needed.
💡 It's important to remember that if you're adding entities that are not listed on the GLEIF database that these will be case sensitive.💡
For example, an entity named 'Example London' will be recognised differently to 'EXAMPLE LONDON'. Make sure invitations are sent to the correct entities, inclusive of spelling and case. To find out more about the invitation process, check out this article here.
If you have any questions about how to set up your account, please contact us at support@createiq.tech.